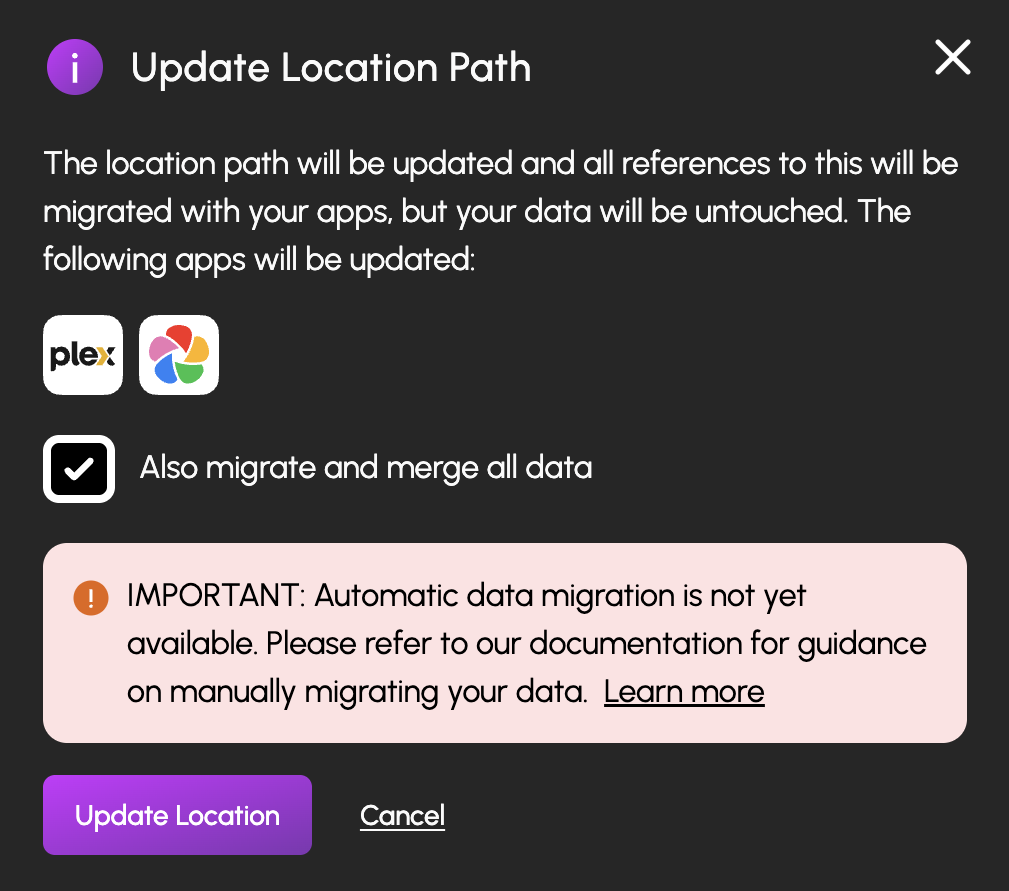
Manual Data Migration
With October 27th's command deck update users can now automatically update app paths. However, as we continue to work on automatic data migration, we wanted to provide a guide that will help you move your data in the interim.
What You'll Need
- HexOS experimental features enabled - For accessing location path updates
- TrueNAS access - Your login credentials (username is typically
truenas_adminand the password you set during initial HexOS setup) - Time - Depending on how large your data size is, this could take a while
- Backups - Always have recent backups before moving data
Important
Always have backups before moving data. While this process is safe, having a backup ensures you can recover if something unexpected happens.
Preparation
Stop Your App
Before moving data, stop any apps that are using it.
In HexOS, go to Apps > Find your app > Click Stop.
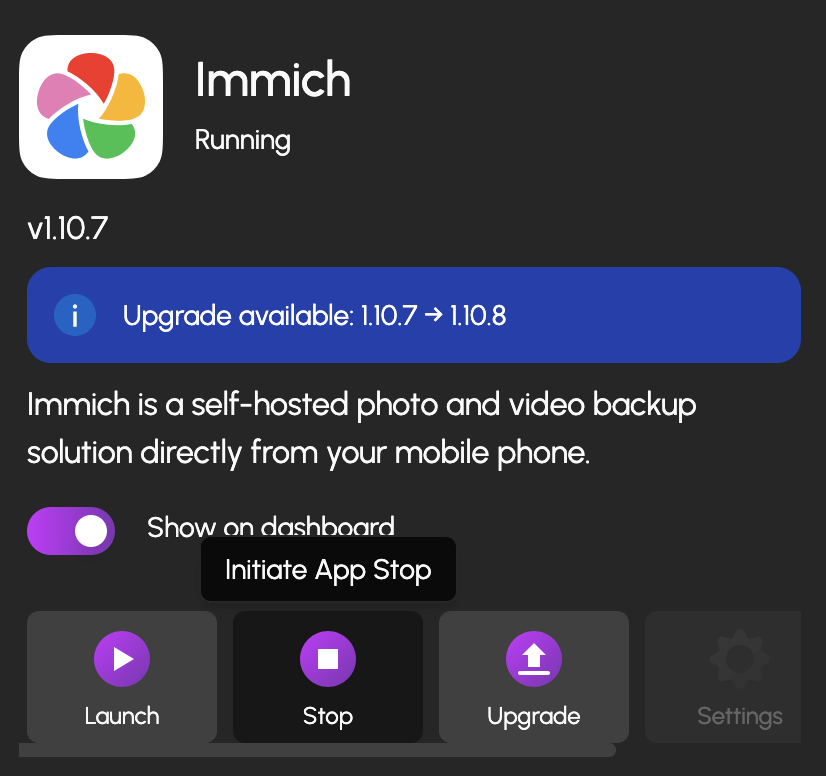
Wait until the app shows as Stopped before continuing.
Update Location Path in HexOS
In order to use the new update location path we will need to enable experimental features.
Go to Settings > Preferences and enable Experimental Features under Miscellaneous.
TIP
Learn more about experimental features in the Experimental Features documentation.
Navigate to Your Location
Go to Settings > Locations and select the location you want to move.
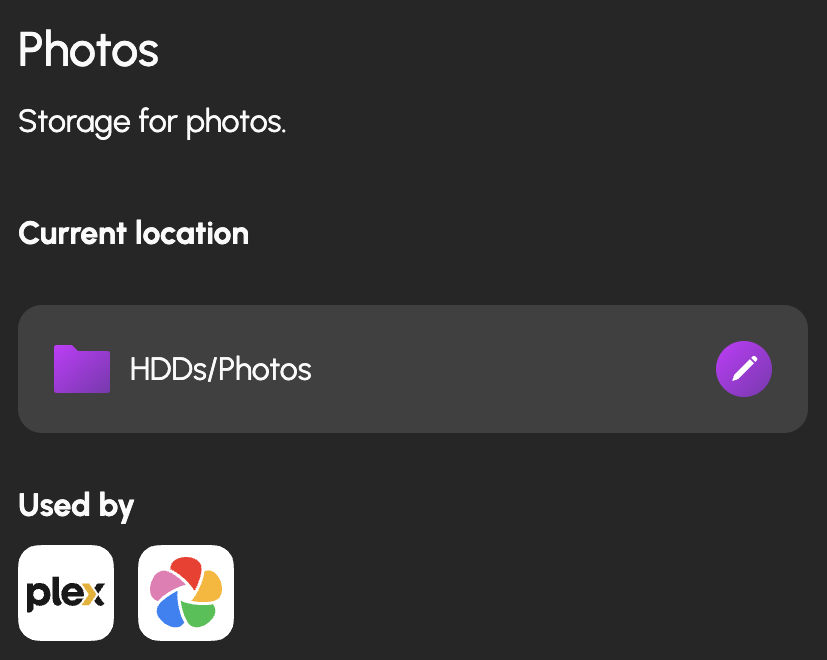
You'll see the current path and which apps are using it.
Update the Path
Click the edit button (pencil icon) and choose your new path.
HexOS shows which apps will be affected.
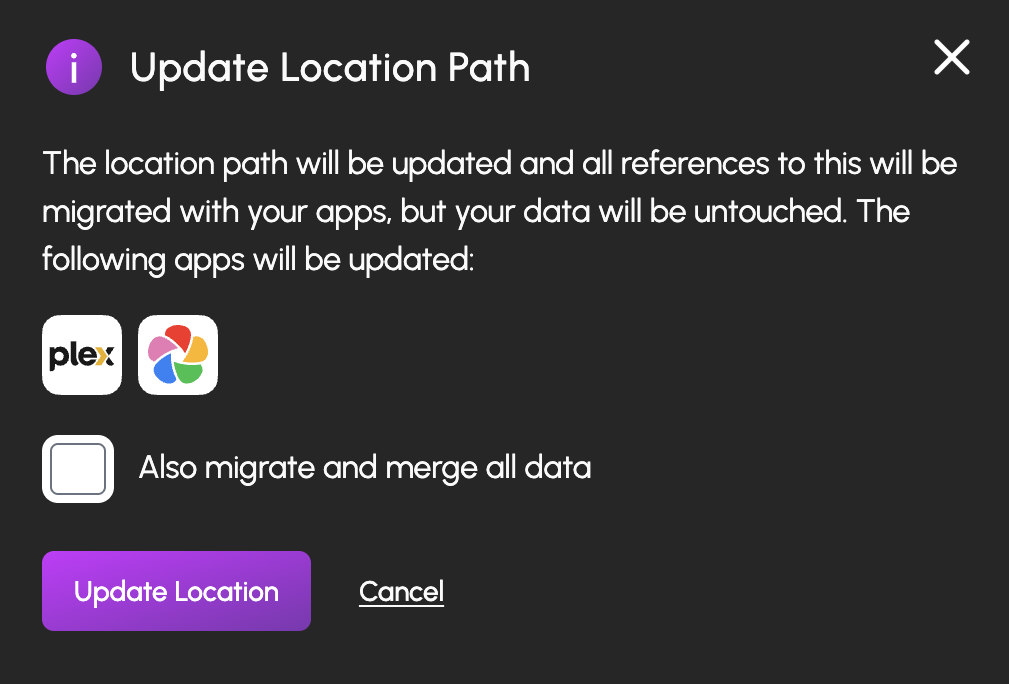 |  |
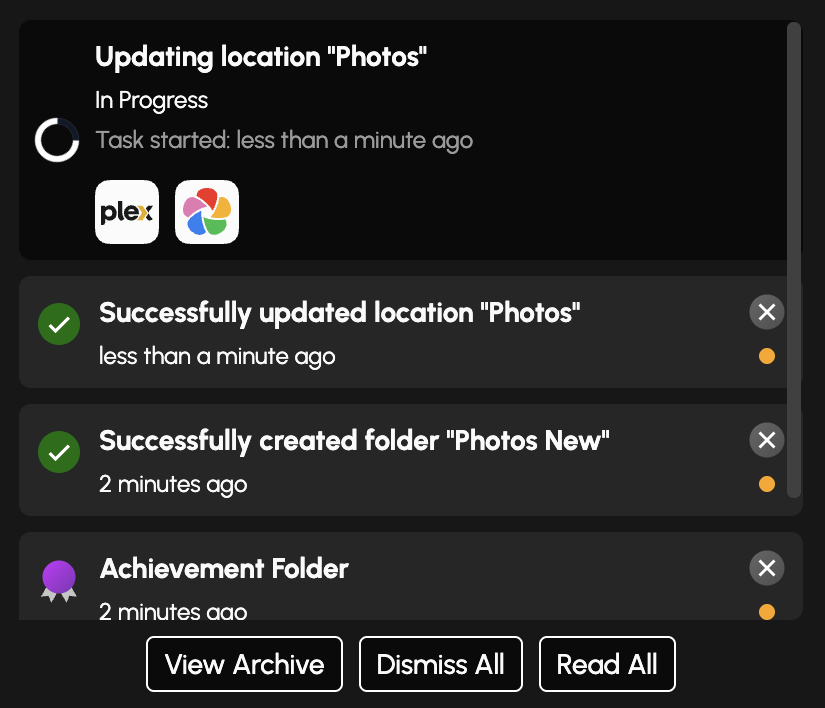
HexOS will then:
- Update each app's configuration to point to the new path
- Set proper permissions
- Record all changes in Activity History
 | 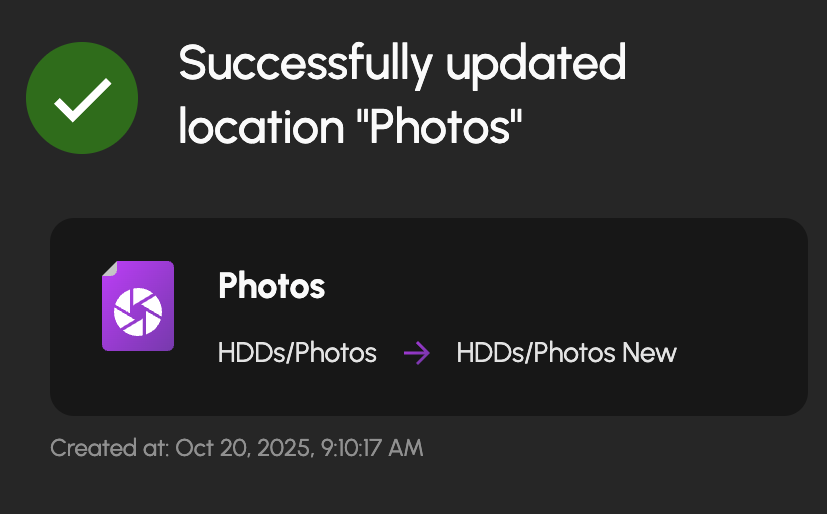 |
Important!
Take note of the new path, in my case its HDDs/Photos New.
This is the path you will need when transferring data.
Migration
Access TrueNAS Shell
Next, we are going to log into TrueNAS so we can open the command shell and start migrating your data.
- Open your web browser and enter your server’s IP address in the address bar.
- Log in using your TrueNAS username and password. (In case you forgot, username: truenas_admin)
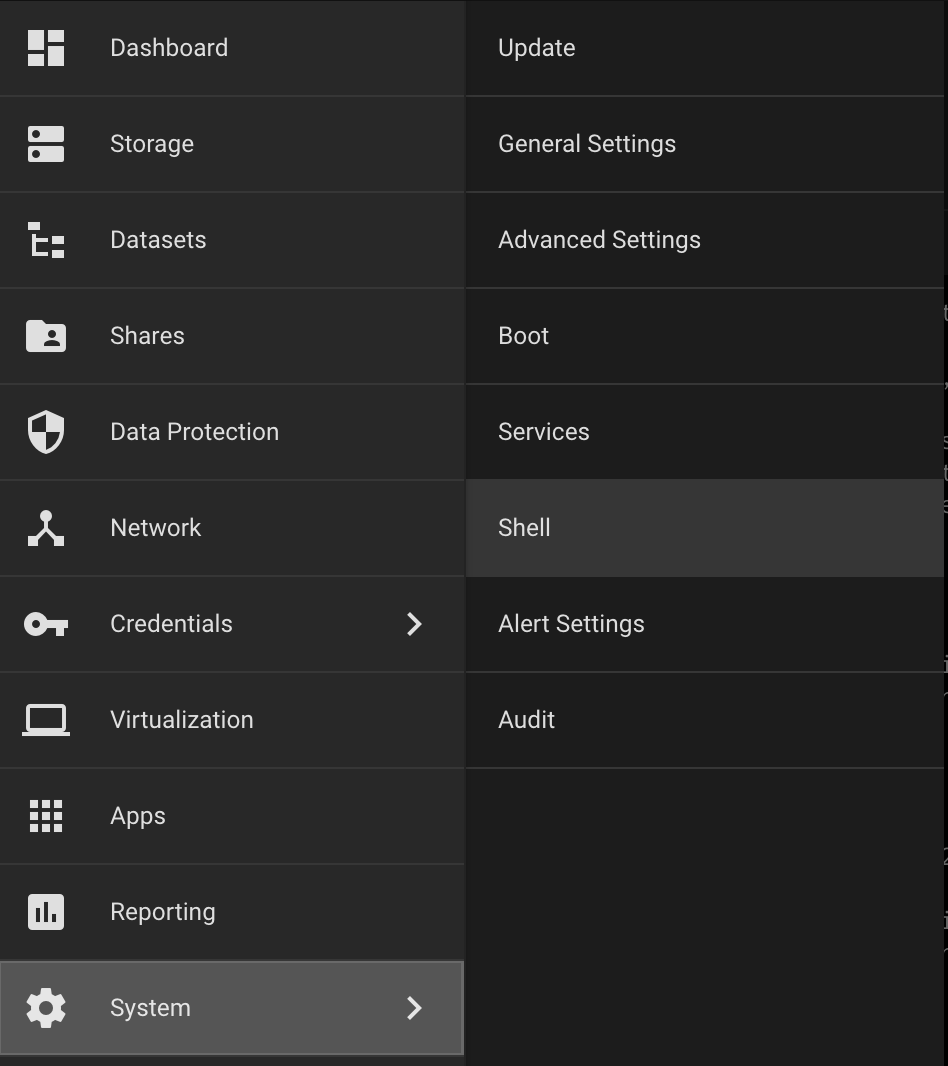
- Once you’re in, look at the left sidebar and click System > Shell.
Verify Your Source Data
Before we migrate, lets make sure we are looking at the data we actually want to affect.
Replace the path below with your old location path:
ls -lah /mnt/<pool>/<old-location>Example: If your old location was HDDs/Photos:
ls -lah /mnt/HDDs/PhotosOutput:
truenas_admin@cole-home[~]$ ls -lah /mnt/HDDs/Photos
total 39K
drwxrwx---  3 root    root      4 Sep 17 05:21 .
drwxr-xr-x 15 root    root     15 Oct 23 09:07 ..
-rwxrwx---  1 nobody  root   8.1K Oct 23 08:49 .DS_Store
drwxrwx---  8 root    root      9 Oct 23 08:49 immich
You should see your expected folders.
In this example, there's an immich folder containing the data to migrate.
This means when I am ready to move data I am going to be targeting HDDs/Photos/immich
Note on App Data vs. Files
When migrating app data (like Immich), you're moving the entire data structure, not just individual files. The app needs all its folders (library, upload, thumbs, backups, etc.) together to function properly.
Copy Data with Rsync
Now we'll use rsync to copy the data from our old path to the new one.
Replace the paths below with your old and new location paths:
sudo rsync -avh --stats --progress /mnt/<pool>/<old-location>/ /mnt/<pool>/<new-location>/Example: Moving from HDDs/Photos/immich to HDDs/PhotosNew/immich:
sudo rsync -avh --stats --progress /mnt/HDDs/Photos/immich/ /mnt/HDDs/PhotosNew/immich/What This Command Does:
-a= Archive mode (preserves permissions, timestamps, ownership)-v= Verbose (shows what's being copied)-h= Human-readable sizes--stats= Shows summary when complete--progress= Shows progress for each file
You will likely be prompted for your truenas_admin password (the root password you set during HexOS setup).
When typing your password, it won’t appear on the screen, that’s normal! Just type it carefully and press Enter when you’re done.
Once the transfer begins, you'll see files scrolling by as they copy. When it’s finished, rsync will display a summary of the transfer.
Output:
Number of files: 60 (reg: 27, dir: 33)
Number of created files: 60 (reg: 27, dir: 33)
Number of deleted files: 0
Number of regular files transferred: 27
Total file size: 863.51K bytes
Total transferred file size: 863.51K bytes
Literal data: 863.51K bytes
Matched data: 0 bytes
File list size: 0
File list generation time: 0.001 seconds
File list transfer time: 0.000 seconds
Total bytes sent: 867.18K
Total bytes received: 769

sent 867.18K bytes  received 769 bytes  1.74M bytes/sec
total size is 863.51K  speedup is 0.99
Key things to check in the summary:
Number of files- How many files were copiedTotal file size- Total amount of data transferredspeedup- Rsync efficiency metric
This Can Take Time
Large data migrations can take hours. The time depends on:
- Amount of data
- Number of files
- Disk speed (HDDs are slower than SSDs)
- Whether you're copying within the same pool or between pools
Verify the Migration
Now that we have copied the data to the new location, we are going to want to check that it actually exists.
Check the New Location
Replace with your new location path:
ls -lah /mnt/<pool>/<new-location>/Example:
ls -lah /mnt/HDDs/PhotosNew/Output:
total 9
drwxr-xr-x  3 root root    3 Oct 23 09:20 .
drwxr-xr-x 15 root root   15 Oct 23 09:07 ..
drwxrwx---  8 apps apps    9 Oct 23 08:49 immich
Here I can see that immich and its contents have been moved to PhotosNew from Photos.
However, I do want to verify that everything is actually there, so lets check the actual size of the folder.
Compare Sizes
Replace with your old and new paths:
du -sh /mnt/<pool>/<old-location>
du -sh /mnt/<pool>/<new-location>
Example:
du -sh /mnt/HDDs/Photos/immich
du -sh /mnt/HDDs/PhotosNew/immich
Output:
1.2M    /mnt/HDDs/Photos/immich
1.1M    /mnt/HDDs/PhotosNew/immich
You might see a small difference like 1.2M vs 1.1M. This is usually due to rounding, and we can actually check their actual sizes.
Replace with your old and new paths:
du -sb /mnt/<pool>/<old-location>
du -sb /mnt/<pool>/<new-location>
Example:
du -sb /mnt/HDDs/Photos/immich
du -sb /mnt/HDDs/PhotosNew/immich
Output:
1214669    /mnt/HDDs/Photos/immich
1214669    /mnt/HDDs/PhotosNew/immich
The sizes should match exactly.
Verification
Now that the data is moved, we can start the app up again to verify everything is working.
Go to Apps and click Launch.
Open your app and check that:
- Your data is visible
- Everything functions as expected
- You can upload/download (if applicable)
- All features work normally
Earlier we moved the location path, so all the permissions have been adjusted for us.
Remove Old Data
You've triple checked that all the data is functional right?
Then we can safely remove the data from the old path.
If the old folder is one you don't plan on using anymore you can simply delete the whole folder inside of HexOS.
Otherwise, let's go back to the shell inside of TrueNAS and use this command to delete your data from the old folder.
Replace with your old location path:
sudo rm -rf /mnt/<pool>/<old-location>Example:
sudo rm -rf /mnt/HDDs/Photos/immichRelated Resources
- Community Guides - App-specific migration guides
- Immich Migration (Rsync Method) - Detailed Immich example
- Immich Migration (Move Method) - Alternative Immich approach